Table of Contents
Personalize your Shopify products
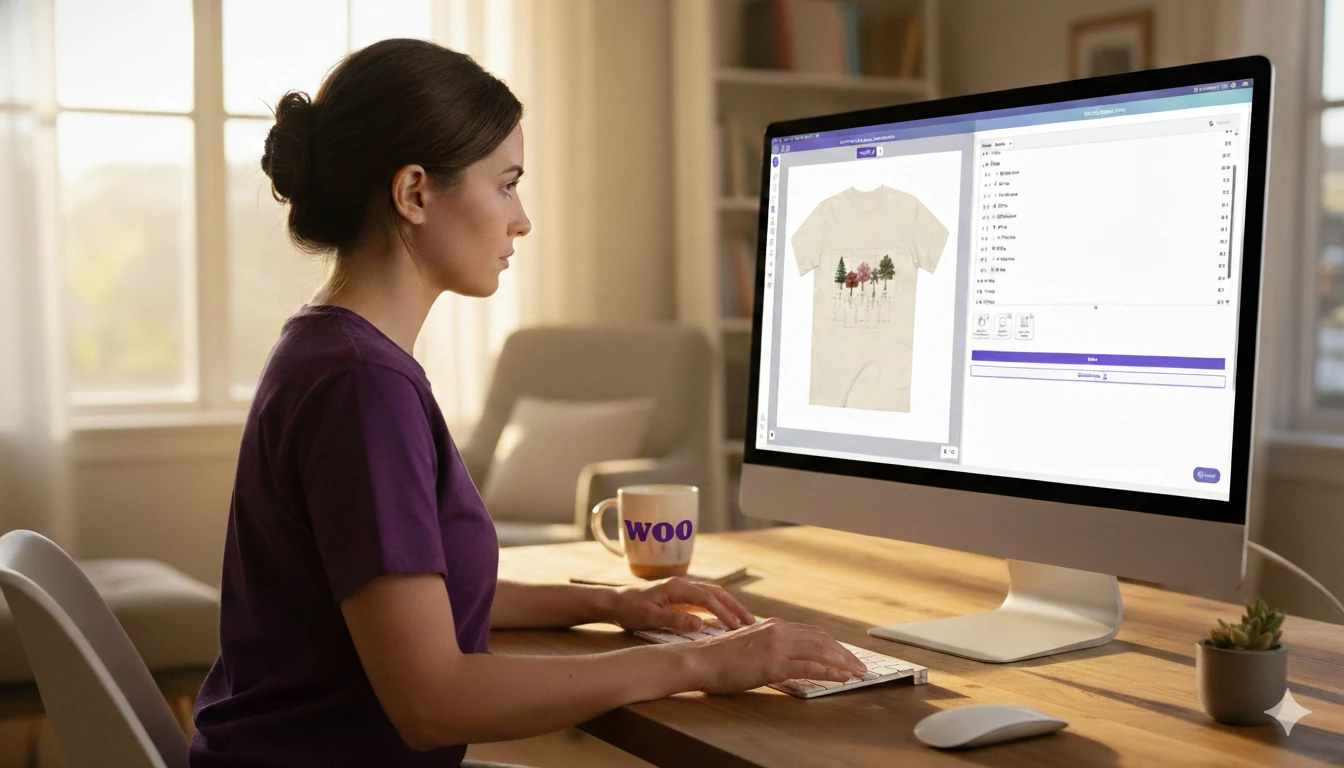
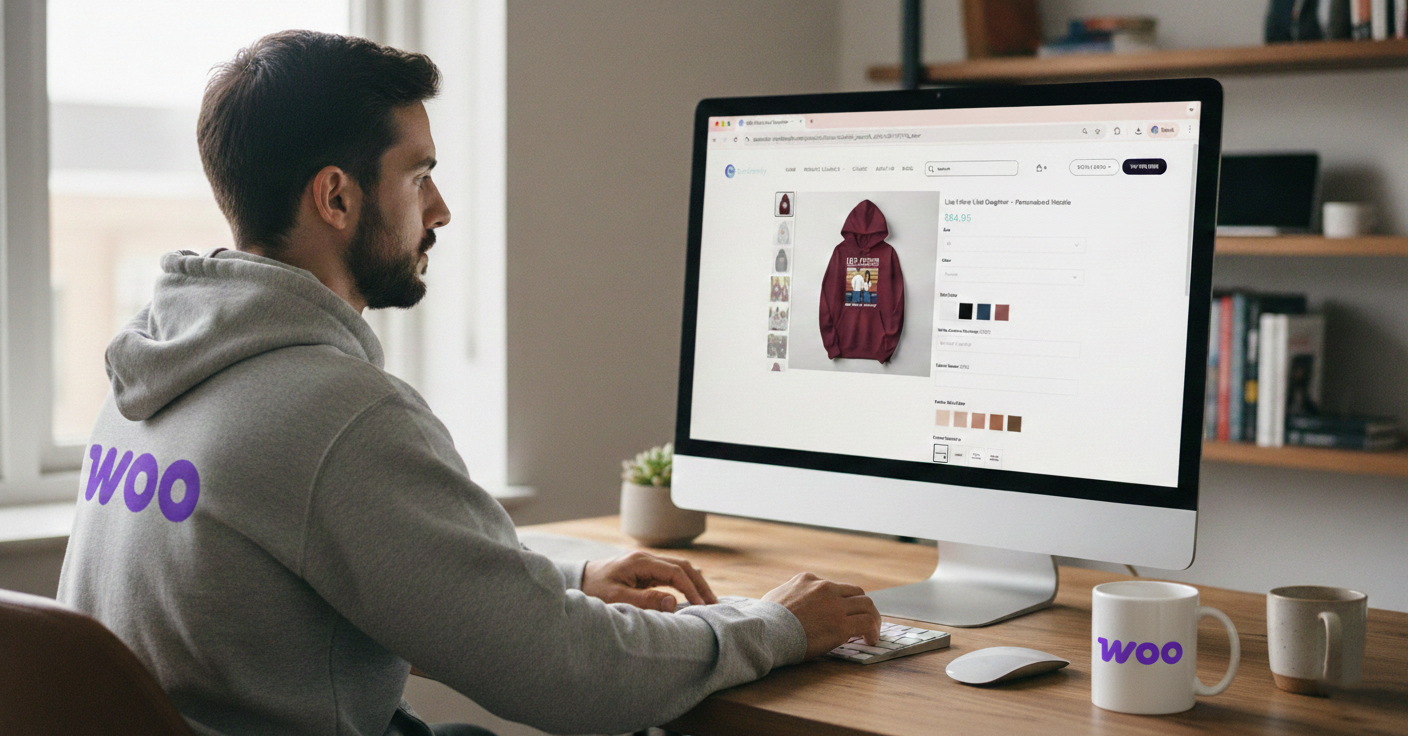
Install for freeSelling personalized products has become super popular lately, and it's pretty much essential for print on demand stores that want to stand out 💫
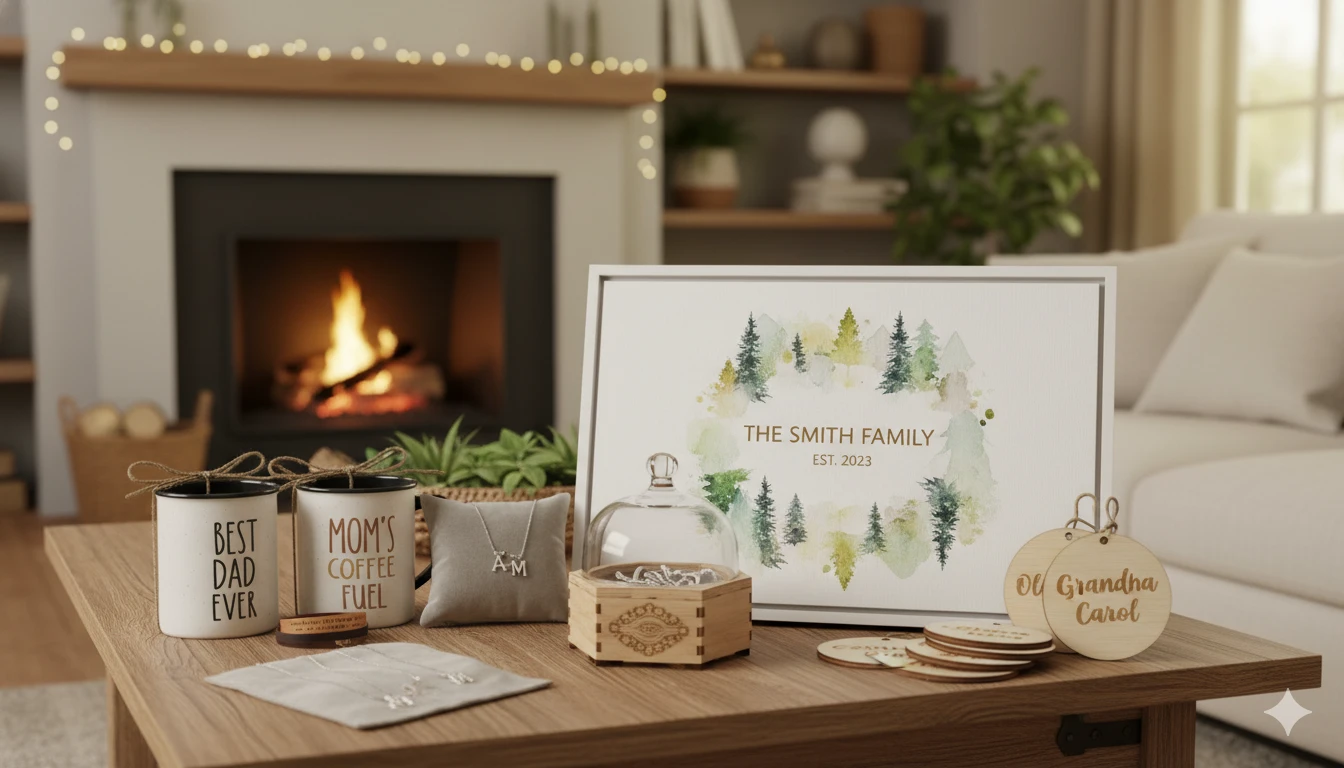
Imagine letting your customers turn a regular item into something special that really means something to them. There are lots of occasions throughout the year where personalized gifts are perfect. Valentine’s Day, Mother’s Day, Christmas, you name it. Any big moment in someone's life is a great chance for a personalized present. And as more people catch on to how awesome it is to give something customized, the market for these kinds of products just keeps growing 💞
The cool thing is if you’re already selling print-on-demand products from any of the popular companies in the market (Printify, Printful, Gelato, merchOne, Shine On, Custom Cat…) adding personalization options to your products is easier than you might think.
All you need is a reliable customization app, with lots of tools to help you turn any regular product into something personalized, that also connects with your provider to help you automate your business and make your life easier 😉
Yes, sounds complicated, but trust me, it’s really not! 💪🏻
And in this guide, I’m going to show you a step-by-step tutorial on how to add personalization to your print on demand products fast and easily! ⚡
- Why use Customily for your print-on-demand business?
- How does it work?
- Installation
- Integration
- Creating Your First Product - Using a Design from Customily
- Creating Your First Product - Using Your Own Design
Are you ready? Buckle up! 🛫
Why use Customily for your print-on-demand business?
If you’re reading this, I assume that you have a print on demand business and feel like trying product personalization. Or you’ve been smart already, and just installed the best app for product customization but need more information on how it works.
If by any chance you’re just searching for information to launch a print-on-demand store, I’d recommend you navigate through these articles first:
● Personalized Print-On-Demand basics and potentials for this market.
● Print On Demand profits and what to expect.
● Best Print On Demand companies to work with.
● Print On Demand product ideas to sell.
Now, assuming you’re already selling print on demand products, why should you add Customily to the equation?
💜 Unique products:
Thanks to product personalization, you will always be selling unique products that have a special meaning for the person buying them. That bond not only allows you to sell your products at a higher price (there’s enough evidence by now that people are willing to pay more for a customized product due to its uniqueness) but also increases the engagement of the user on your website (which leads to more completed sales) and the overall satisfaction with your products and brand.
💜 Customization Features:
Customily has a wide range of features, which makes it a perfect choice for any kind of business. If you’re searching for basic customization tools, you will find the option to add texts, dynamic images, fonts, colors, and upload photos. But if you’re ready to go a step beyond, Customily also offers tools for complex personalizations, and amazing features like custom street maps, star maps, cartoonizers, or AI image generation. You will not find an app with a better range of tools that can really help your store stand out!
💜 Live Preview:
The Mother of all features. It’s key that you allow your customers to see what their customizations will look like before they buy. That they are able to play around with the personalization options while seeing a live preview of it. This feature helps them make informed decisions and reduces the chances of returns, which keeps everyone happy.
💜 Printing Files:
Mistakes can really ruin the magic of personalization. So, alongside the live preview, Customily lets you download a printing file with all the info needed to make the product. That way, you can avoid any mix-ups and keep your customers smiling. This feature will save you lots of time and headaches!
💜 Easy Integration:
Integrating Customily with the best print-on-demand providers in the market is incredibly easy. With just a couple of clicks, you can make everything run smoothly and ensure you can offer top-notch service to your customers.
💜 Clipart and design collections:
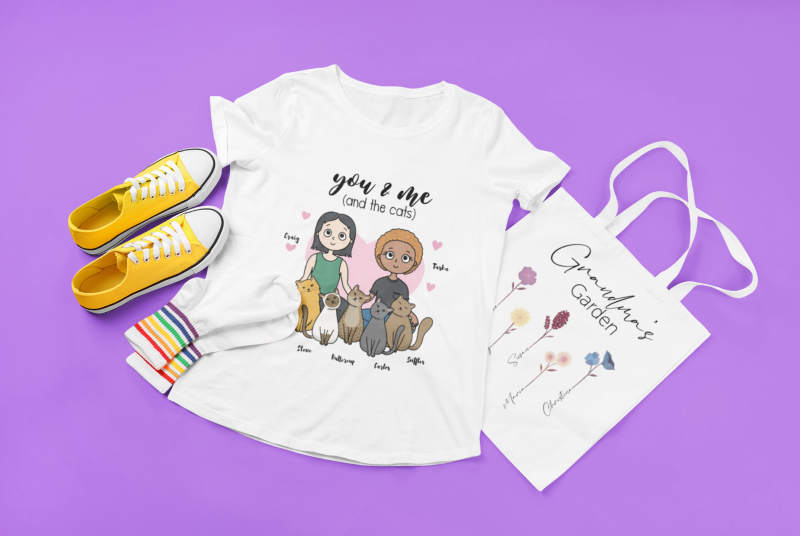
With Customily, you can create your own art, or buy clipart on Etsy or Creative Fabrica and upload it to the app. But what if you don’t have your own art? If you don’t want to spend extra money on freelance designers, don’t worry. Customily offers you a wide collection of designs that you can use on any product, totally free. All Customily users on Shopify and Etsy can take advantage of this and have complete personalized products published in minutes in their stores, without any extra help.
Convinced, yet? 😉
Thanks to the technology provided by Customily and its partners, selling personalized products online has become a piece of cake 🍰
You can automate nearly every step of the selling process, from managing orders to fulfilling and shipping them. All you have to do is focus on creating awesome products and promoting them to attract the right audience to your store! 🎉
How does it work?
Enough of circling, let’s get our hands dirty. Here's everything you need to know to kickstart your journey of selling customized print-on-demand products with Customily! 💜
1. Installation
The first step is as easy as it is obvious, you need to have a Customily account.. and a print-on-demand supplier one!
To install Customily, you have 2 options:
- You can install Customily for Shopify here
- Or Customily for Etsy here.
If by any chance you haven’t chosen your print-on-demand provider yet, here you can create an account with any of the best ones:
2. Integration
Once your accounts are set up and running, it's time to link them together. This step is essential before you start creating and publishing your products because it enables automatic fulfillment.
Automatic fulfillment means that once you begin receiving orders, the information will seamlessly transfer from Customily to your provider. This ensures that the provider can efficiently handle the fulfillment and shipping of the products!
To link your accounts, simply follow these steps:
- Log in to your provider account and find your API Key. If you need help with this, here’s a complete article where we show where to find the API Key for each POD.
- Login to your Customily App.
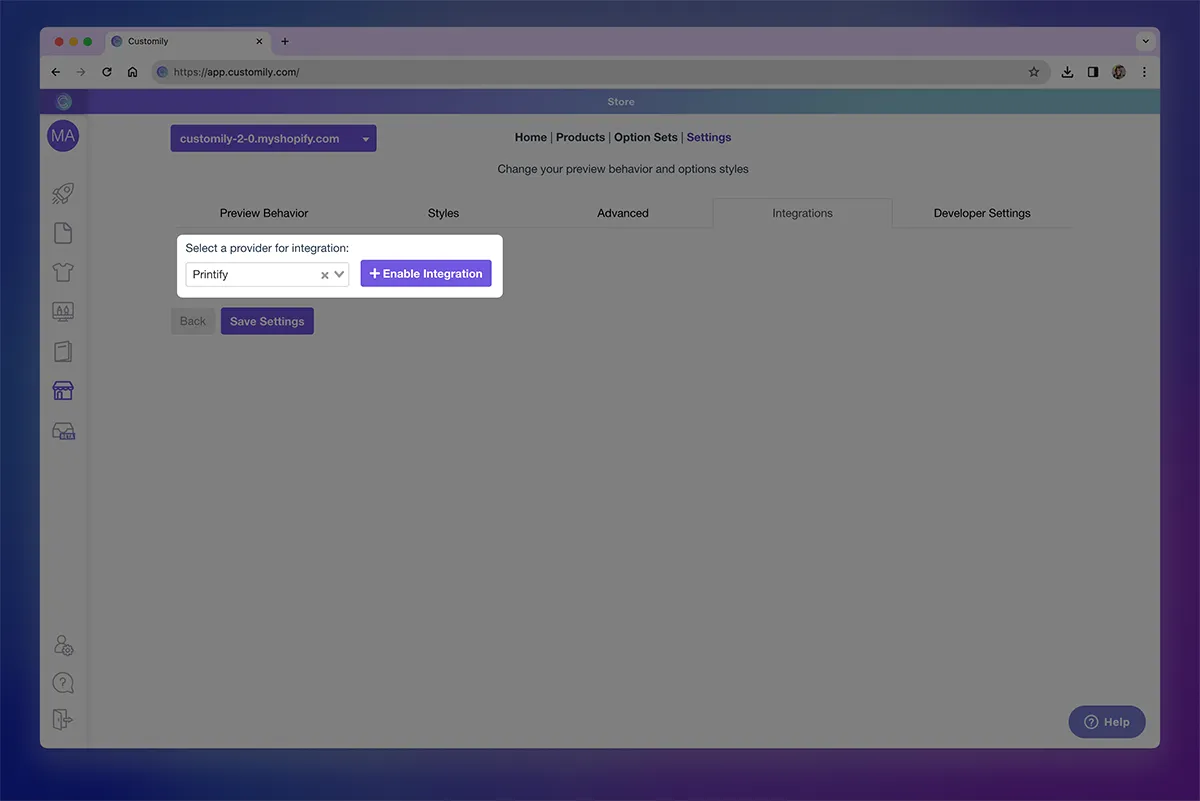
- Go to Settings and open the Integrations tab.
- Select your provider from the Select a provider for integration dropdown.
- Click the enable integration button.
6. Paste your API KEY and then Save Settings.
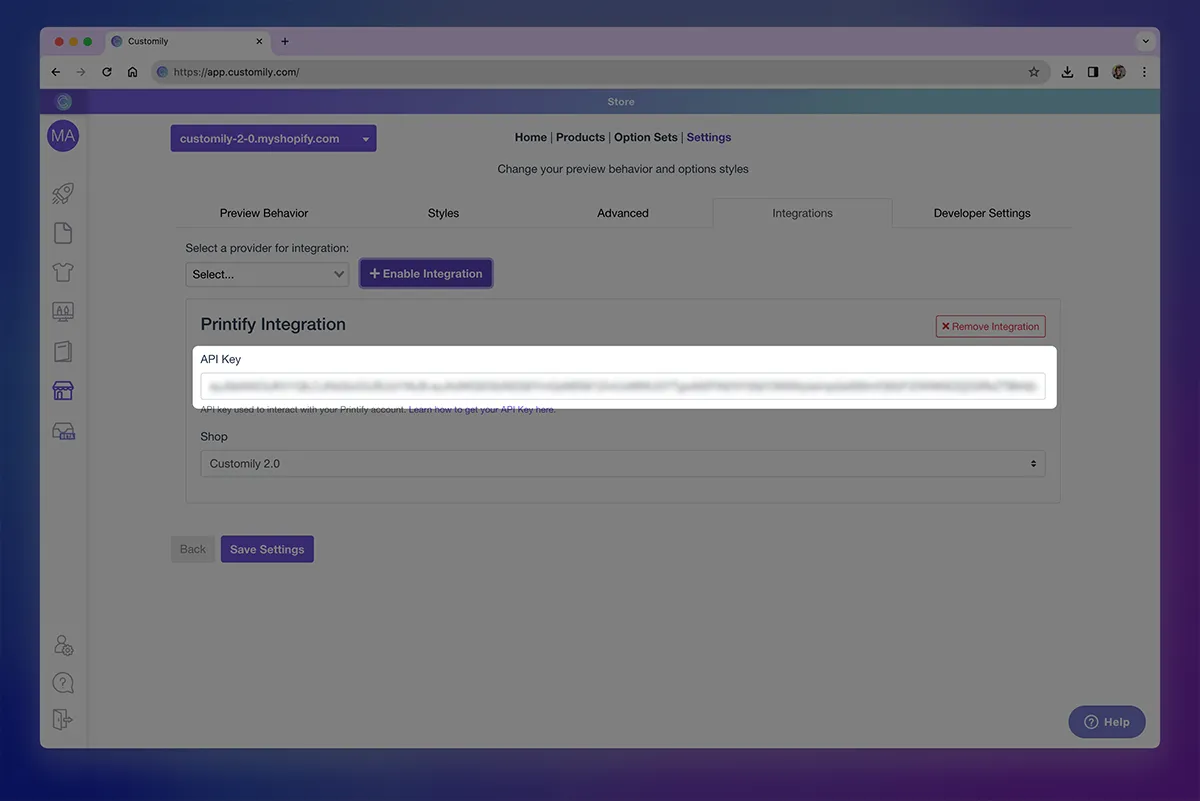
Great job! Your accounts are now connected! 🎉
You're all set to begin creating your personalized designs and adding them to your products.
3. Creating Your First Product - Using a Design from Customily
Let's jump into the Customily App. It's important to note that you'll need to create and publish your products from the Customily App for the entire automated process to function correctly. Your products will then be published in your Shopify or Etsy store from there.
Imagine you want to sell a personalized canvas for Mother’s Day. In Customily, you have two options:
- You can use a customized design from Customily’s collection.
- Or you can create your own design.
One fantastic feature of Customily that sets it apart from other apps is its extensive collection of clipart and designs ready for sale. With over 300 designs available, you have plenty of options. You can select a design to sell directly in your store, or you can choose a design as a base and edit it to create your own version.
In this first part, we'll guide you through creating a product using a design from Customily. If you're interested in crafting your own designs, feel free to skip ahead to part 4.
📌 For the purpose of this tutorial, we’re going to use merchOne as the print-on-demand provider, but keep in mind that the process can be applied to any provider listed in Customily.
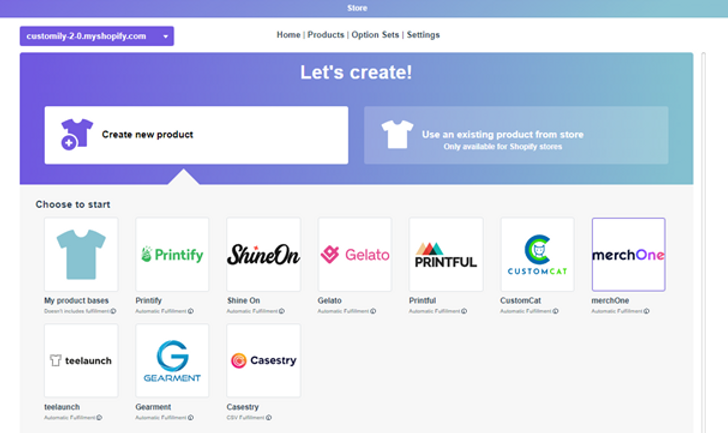
- Go to the START menu.
- Click on the Create new product button.
- Pick your print-on-demand supplier.
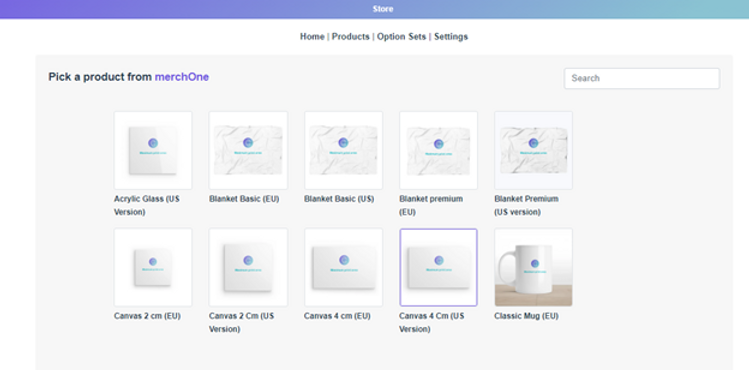
4. Browse through the provider’s product catalog and choose the product that you want to publish. For this tutorial, we’re going to pick the Canvas 4 CM (US Version) from merchOne.
📌 If you want to sell a product that’s not in the catalog, feel free to send an email to support@customily.com and request us to add it to the catalog!
5. Pick out all the variants of your product that you'd like to make available. In this case, edge design and size. If it’s a t-shirt, you will be picking colors and sizes. Click Next.
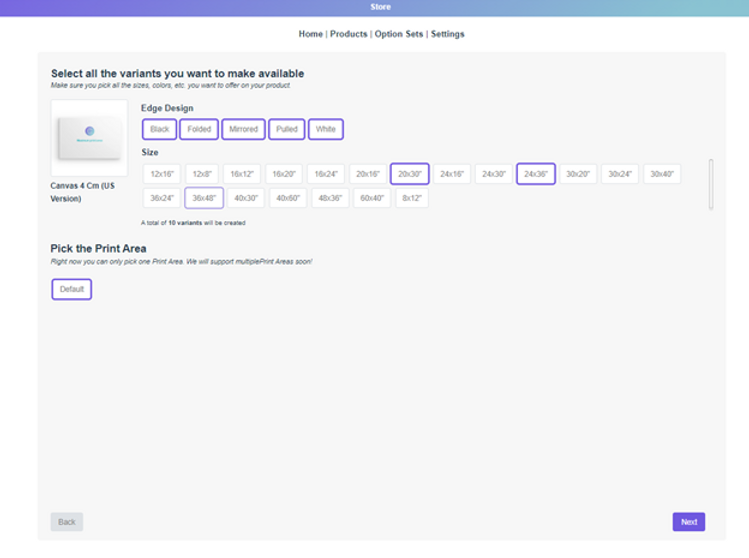
6. In this step, you'll need to decide whether to add a design from Customily or from your personal collection. In this case, we’re using a pre-made design from Customily.

7. Browse through the collection to pick the design you want to add. You will find a search bar on the right where you can search by collection, for example, “Mom”.
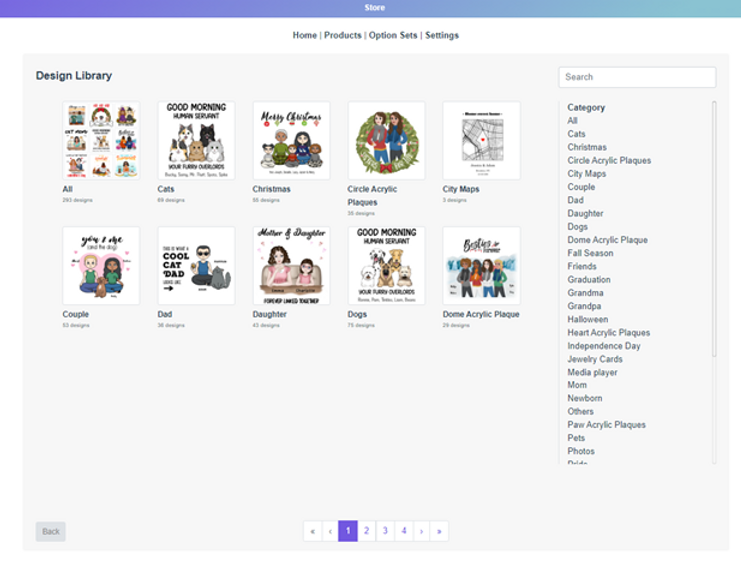
8. Select the design, and wait a few moments while Customily creates the product for you. Throughout this process, Customily generates the product page on your Shopify or Etsy store for the selected product. It incorporates the chosen design along with all the personalized options.
9. Once you've finished, you'll get a sneak peek of your product before it goes live. This preview reflects exactly what your customers will see when the product is available in your store.
So, what's next? Here are some handy tips ✍🏻
- Play around with the personalized options and save the preview as the main product image of your listing.
- Experiment with the personalized options to generate various previews. Save these images to use later on your product page as secondary images. This will offer your customers more inspiration for their creations.
- Go to Edit product details to change the title, description, and prize of the product.
- Go to Edit options to modify the order of the personalization options, and add or delete elements.
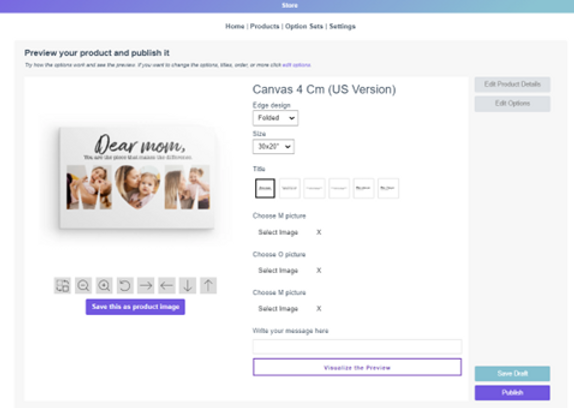
10. Once you’re ready, click on PUBLISH to go live. You can also choose to click on Save draft instead.
If you save the draft, the product listing will be drafted on your store. To make it live later, you'll need to navigate to your Shopify store menu and mark the product as Active.

CONGRATS!! 🎉🎉 Your first personalized product is now live in your store and you can start selling!
4. Creating Your First Product - Using Your Own Design
If you prefer not to use Customily's designs and want to create your own, the process is quite similar to what we outlined in part 3, except you'll need to create the design in advance.
- Go to the START menu.
- Scroll down to My Designs. Here, you'll come across two choices:
- You can generate a new design from scratch.
- Or you can begin with a Customily Design as a foundation, adjust it, and develop your own version of it.

For this tutorial, we'll be creating a completely new design.
3. When you click on Create New Design, it will take you to Customily’s Design Studio. This is where you'll upload your design assets and incorporate personalization options. This way, you can turn a static design into a personalized one.
Firstly, you'll need to give your design a name. By default, the design template will be a square of 1000.00 x 1000.00 mm, but you can click on Resize in the upper bar to adjust it to your desired size.
Once that's done, you can start uploading all your fixed design assets, such as backgrounds or clipart.
📌 Keep in mind that Customily is an asset manager, not a design tool like Canva or Photoshop, so depending on the complexity of your design, you may need to upload files to Customily.
In this case, we uploaded various backgrounds created on Canva, the title text, and a design of puzzle pieces. With Customily, we can add personalized texts inside the pieces.
What else can you add with Customily? Well, you can include curved texts, colors, textures, image placeholders (for customers to upload their own photos), street maps, star maps, face-cutters, cartoonizers, AI image generation, and much more.
If you’re interested in in-depth tutorials about Customily’s Design Studio you can visit their Help Center to find extensive guides or their YouTube Channel for video tutorials.
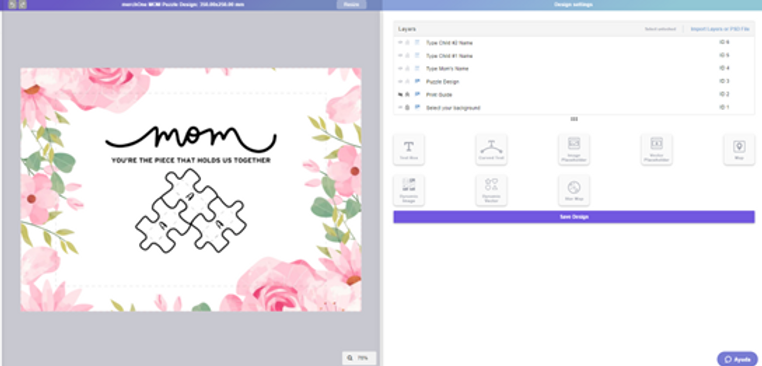
4. Once you’re happy with your design, click Save Design.
You can generate as many designs as you'd like and then apply them to various products. Once you fill your "My Design" section, the process is nearly identical to that in Part 3.
5. Go to the START menu.
6. Click on the Create new product button.
7. Pick your print-on-demand provider.
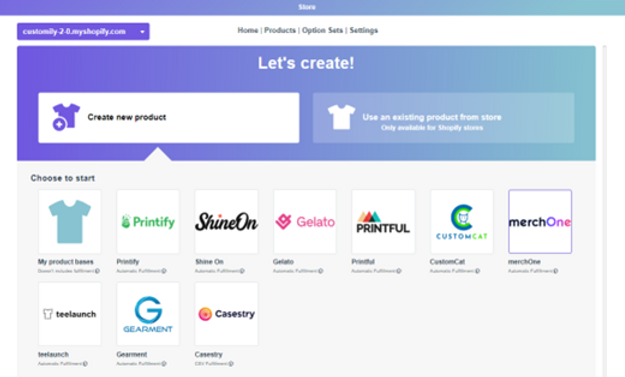
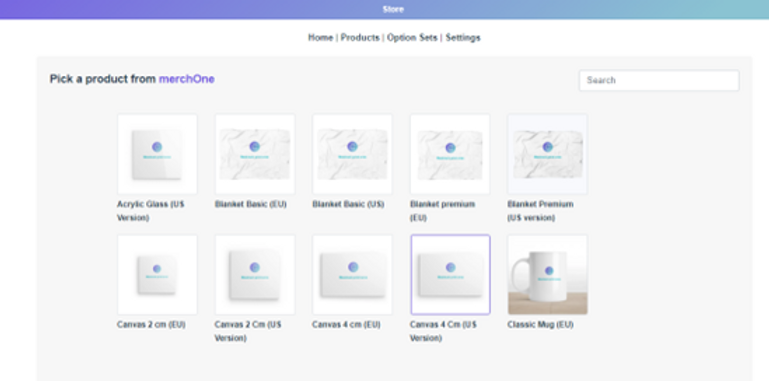
8. Browse through the provider’s product catalog and choose the product that you want to publish. For this tutorial, we’re going to pick the Canvas 4 CM (US Version) from merchOne.
📌 If you want to sell a product that’s not in the catalog, feel free to send an email to support@customily.com and request us to add it to the catalog!
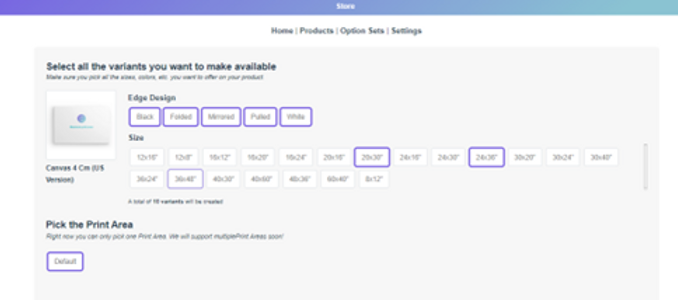
9. Pick out all the variants of your product that you'd like to make available. In this case, edge design and size. If it’s a t-shirt, you will be picking colors and sizes. Click Next.
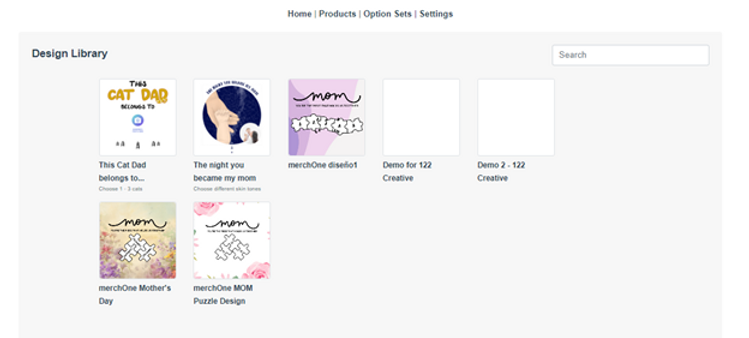
10. Now, you'll need to decide whether to add a design from Customily or your own collection. For this step, we'll be using our own design.

11. Scroll through your designs and choose the one you'd like to use. Wait a moment while Customily generates the product for you. Throughout this process, Customily creates the product page on your Shopify or Etsy store for the selected product. It then incorporates the chosen design with the personalized options.
12. Once ready, you will see a preview of your product before publishing it. This preview is exactly what your customers will see on your store once the product is live.
What can you do from here? Here are several tips ✍🏻
- Play around with the personalized options and save the preview as the main product image of your listing.
- Experiment with the personalized options to generate various previews. Save these images to use later on your product page as secondary images. This will offer your customers more inspiration for their creations.
- Go to Edit product details to change the title, description, and prize of the product.
- Go to Edit options to modify the order of the personalization options, and add or delete elements.
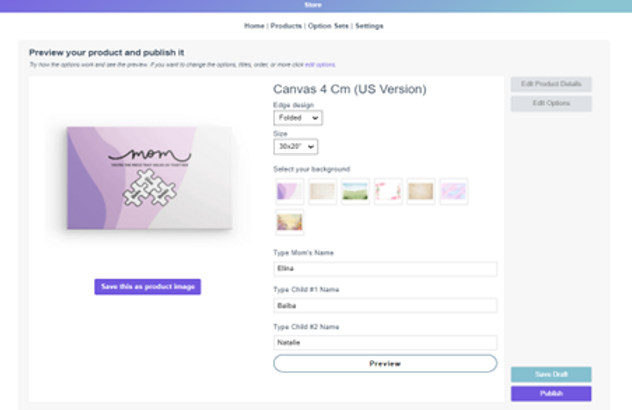
13. Once you’re ready, click on PUBLISH to go live. You can also choose to click on Save draft instead.
If you save the draft, the product listing will be drafted on your store. To make it live later, you'll need to navigate to your Shopify store menu and mark the product as Active.
CONGRATS!! 🎉🎉 Your first personalized product is now live in your store and you can start selling!
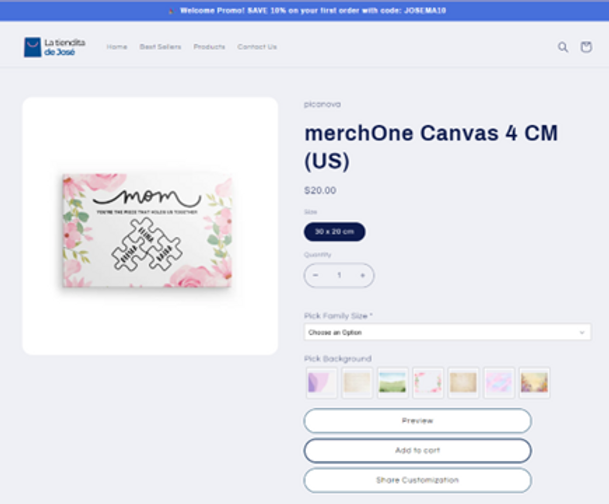
In Conclusion
Now you're all set to begin creating your first personalized products! 💞
Keep in mind that Customily's tools are comprehensive, and there's a lot more you can achieve with them. However, don't dive too deep just yet. It's best to start with the basics to avoid feeling overwhelmed! 😉
If you need assistance with Customily’s tools, feel free to contact the support team at support@customily.com. They will gladly assist you and walk you through your first steps with the app, so you can have personalized products published in your store in no time.
Ready to become part of the customization revolution?! 💫 Waste no more time and get started today, the possibilities are endless!
Happy selling! 💜


