


Table of Contents
Personalize your Shopify products
Install for freeSelling personalized products on Etsy just got more flexible. Customily now supports Etsy Personalization Mode, a new way to collect the customization details you need directly through Etsy's own personalization fields, before an order is even placed.
If you've been running your Etsy shop with Customily's post-purchase flow, this isn't a replacement. It's a second option, and you get to decide which one makes sense for each of your products.
What's Changed: Two Personalization Workflows, One Platform
Until now, every Customily-powered Etsy listing worked the same way: a shopper places an order, receives an automatic email with a personalization link, fills in their details - with full access to Customily's design tools - and Customily generates the production file once they submit.
That workflow, called Post-Purchase Personalization, isn't going anywhere. It's still the right choice for complex, highly customizable products.
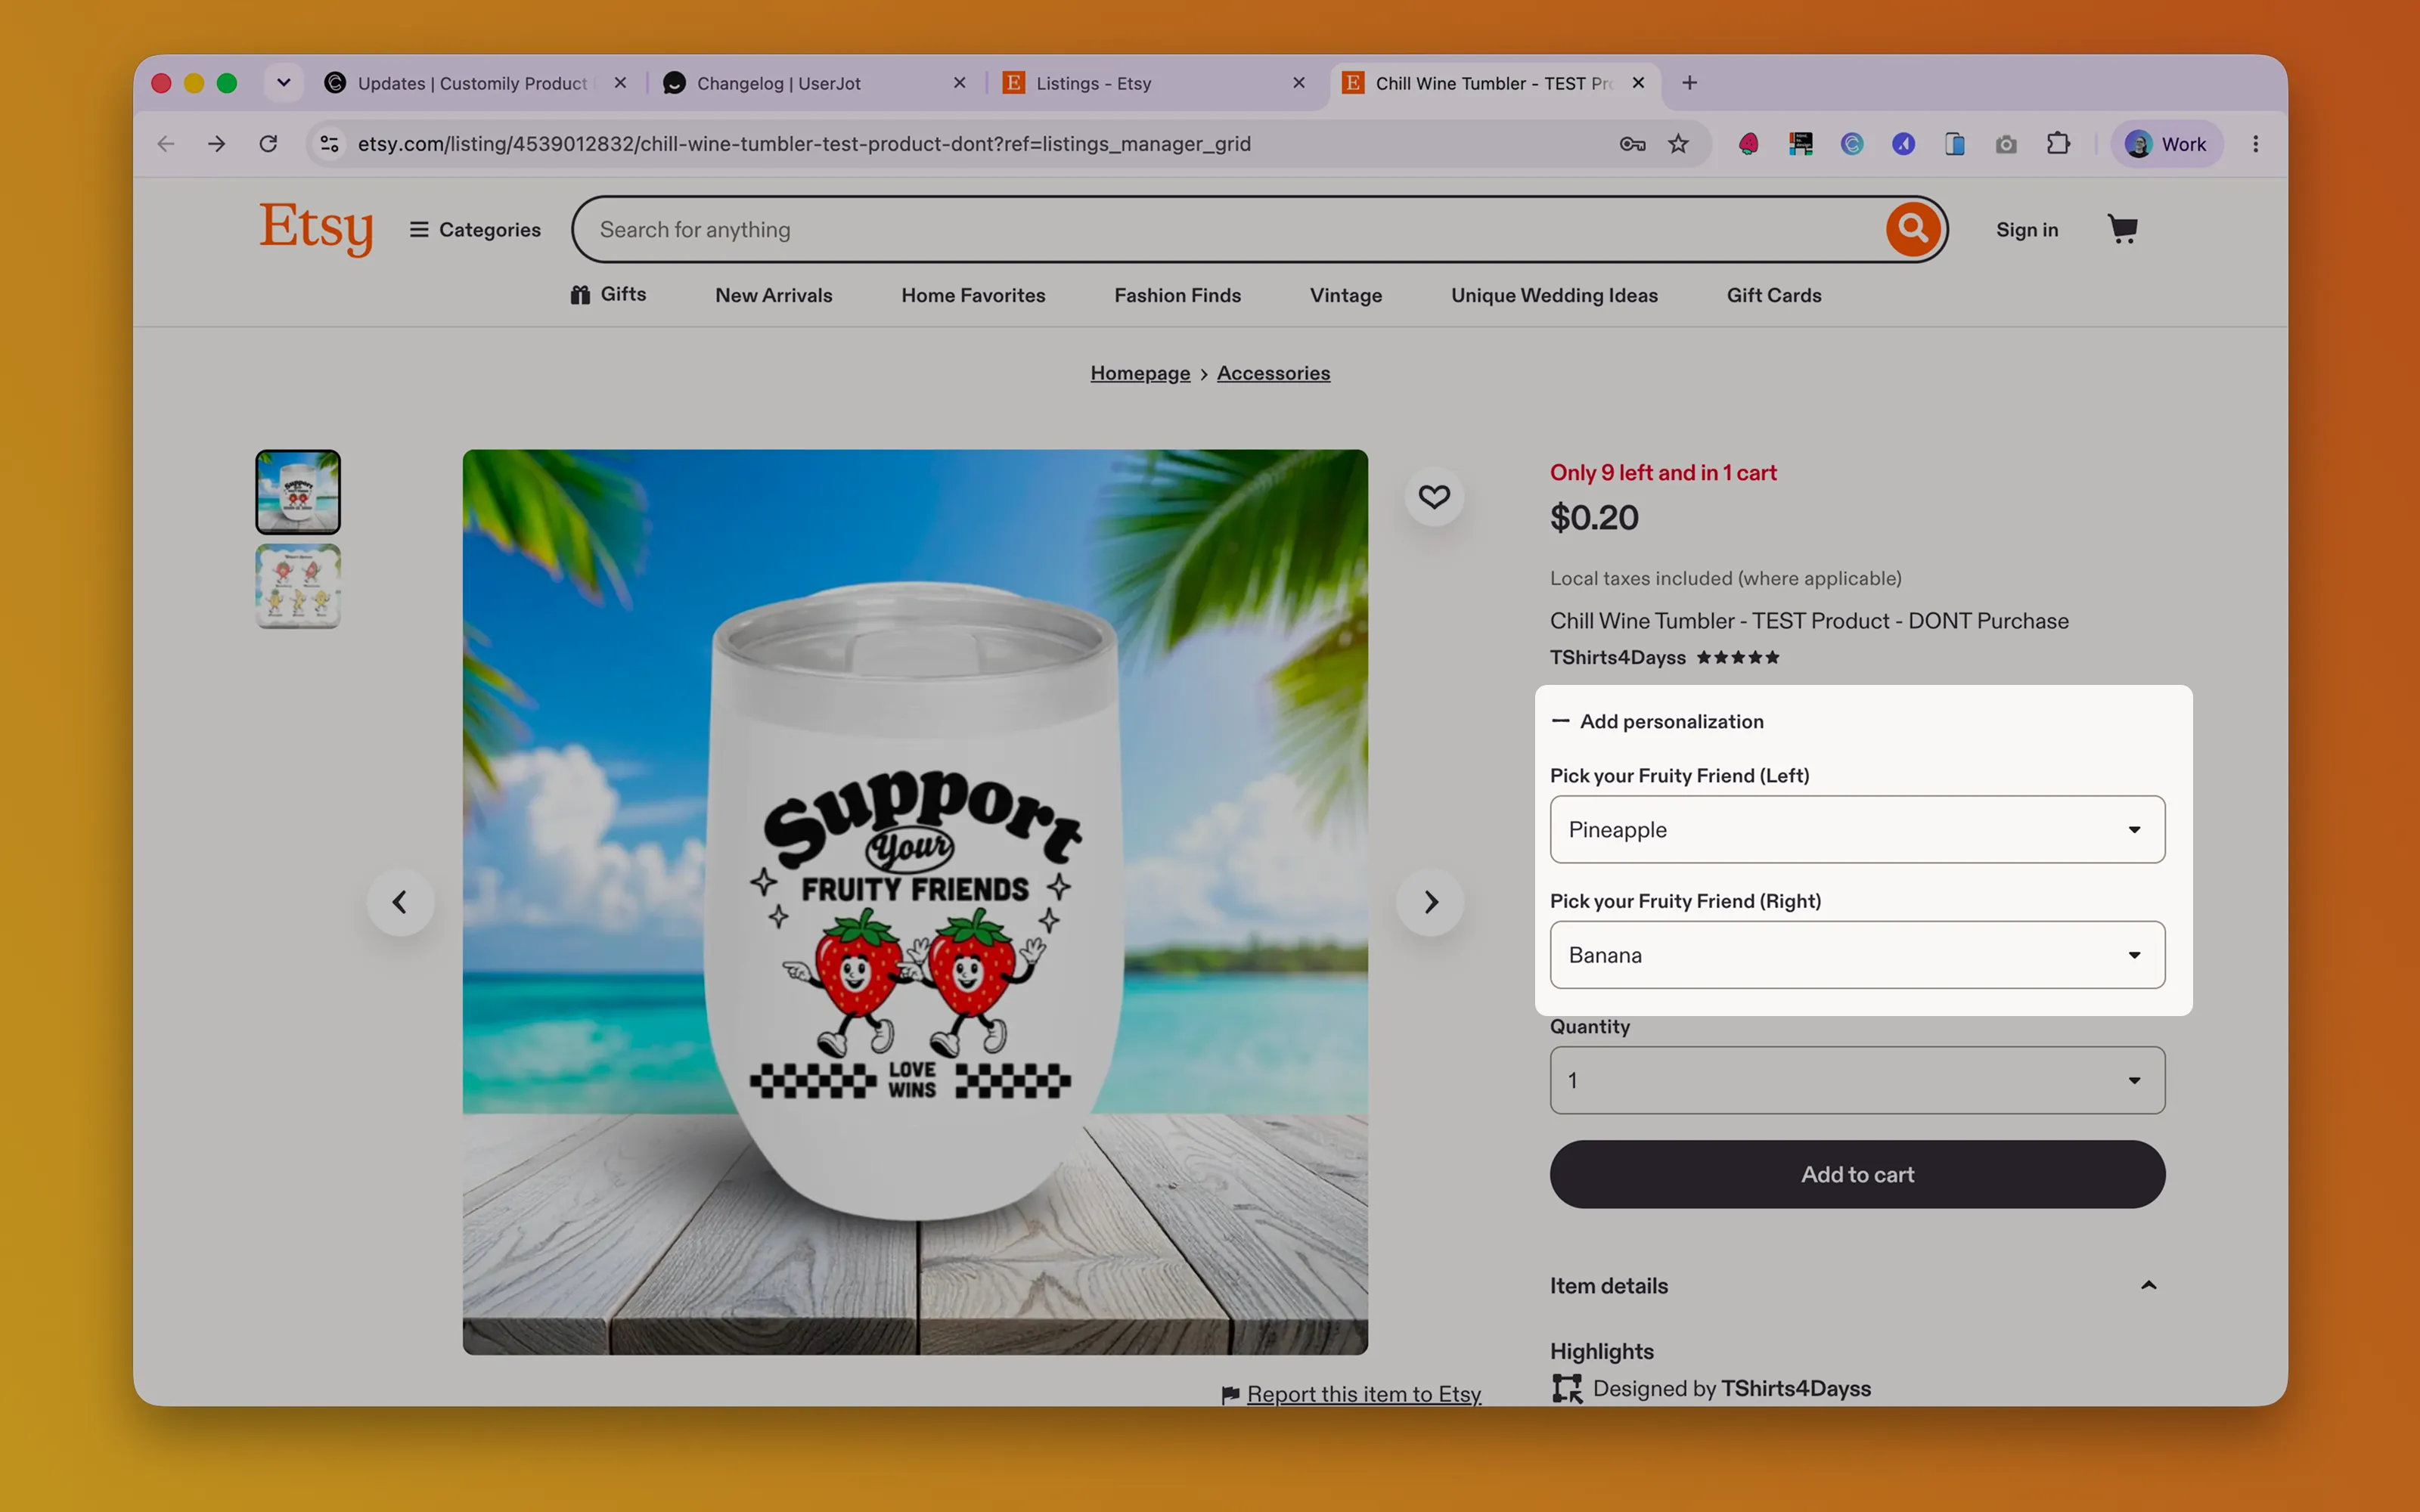
What's new is Etsy Personalization Mode: shoppers can now enter text, choose from predefined options, or upload images directly on your Etsy listing page, using Etsy's native personalization fields; no post-purchase email required. The moment an order comes in, Customily automatically maps that personalization data to your Template and generates the production files, just like it always has.
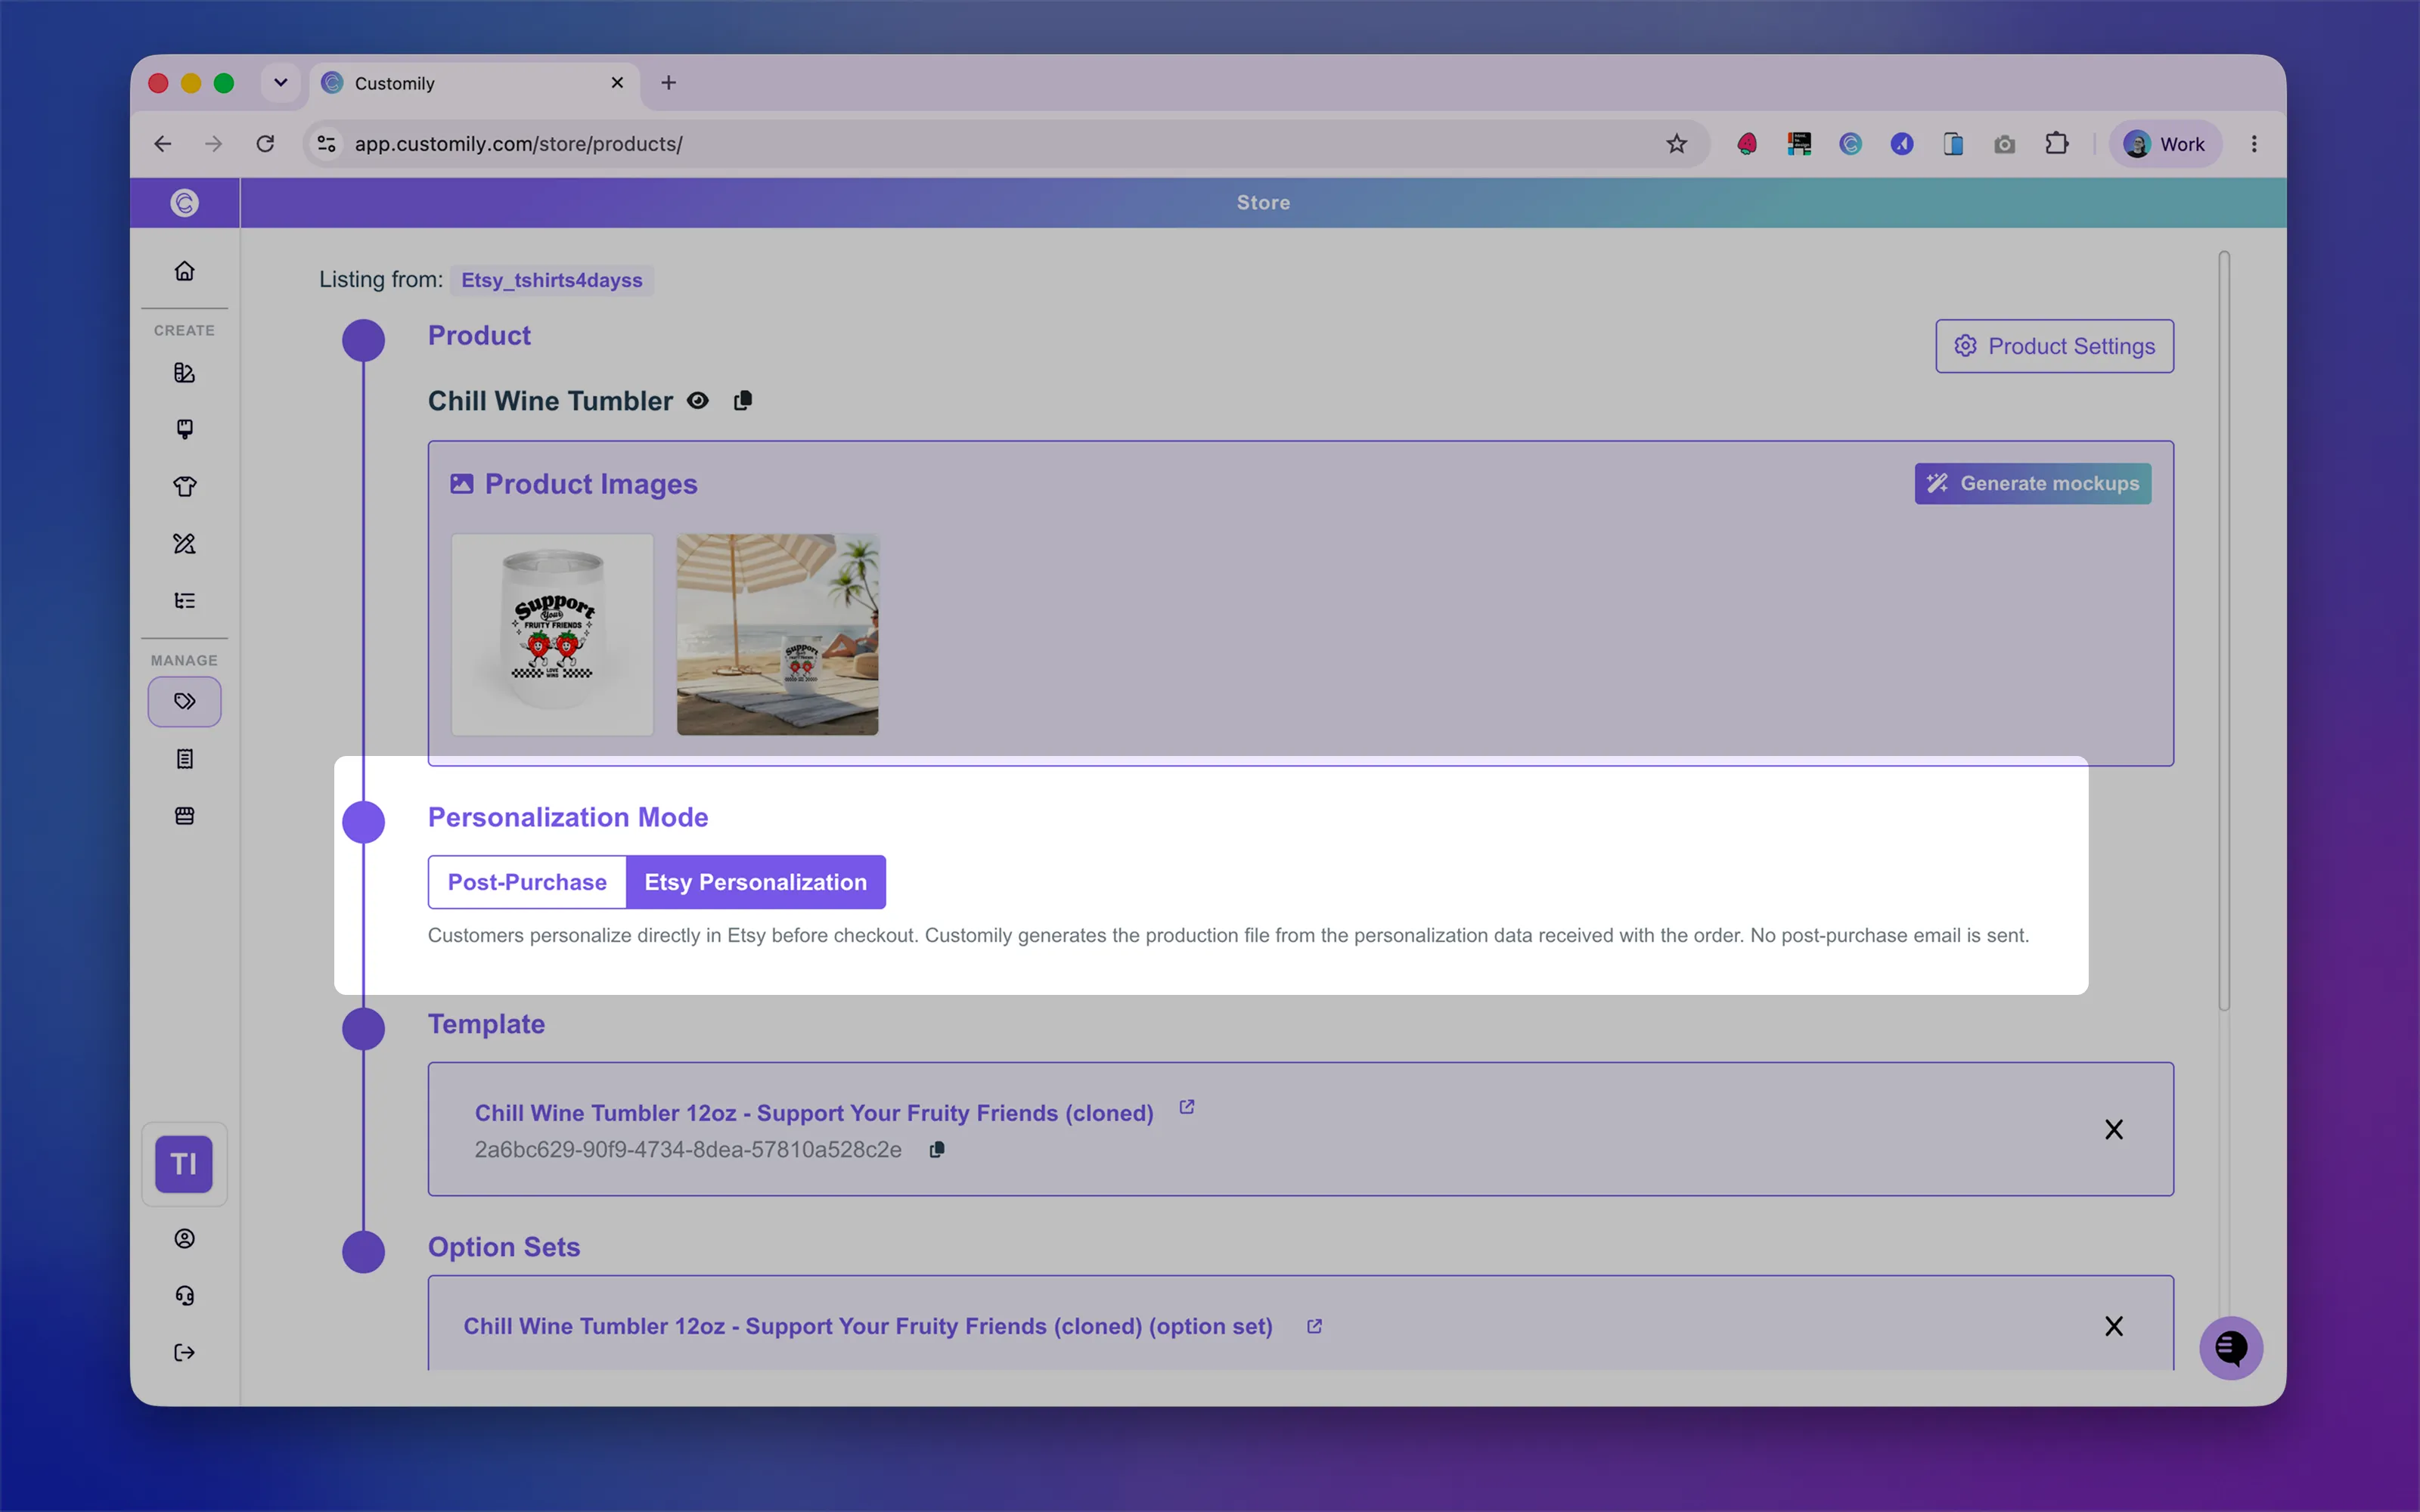
You choose the workflow per product, right from the Product page in Customily, under Personalization Mode. Switch between Post-Purchase and Etsy Personalization any time your product's complexity or your customers' needs change.
Post-Purchase vs. Etsy Personalization: Which One Fits Your Product?
Here's the simplest way to think about the two modes:
- Post-Purchase Personalization: is best for complex products that need a live preview or rely on Customily's full range of design tools and elements.
- Etsy Personalization Mode: is best for simpler products that can be fully personalized directly on Etsy, before checkout, without needing a visual preview.
Neither mode is "better" across the board, they're built for different kinds of listings. A photo collage with multiple layout options, layered text effects, or intricate design logic still belongs on Post-Purchase, where shoppers (or you) can see exactly how everything comes together. A monogrammed tumbler, a name necklace, or a simple photo-upload print is a great fit for Etsy Personalization Mode, where the customization itself is easy to describe without needing a preview.
Many sellers will end up running both workflows across their catalog, keeping intricate designs on Post-Purchase while moving simpler, high-volume listings to Etsy Personalization Mode for a faster, more native checkout experience.
What You Can Personalize with Etsy Personalization Mode
Etsy Personalization Mode currently supports the following Customily elements:
- ✍️ Text Elements: Text Box, Curved Text, and Warp Text
- 🎨 Text Color Options
- 🔤 Text Font Options
- 🖼️ Dynamic Images
- 📷 Image Placeholders
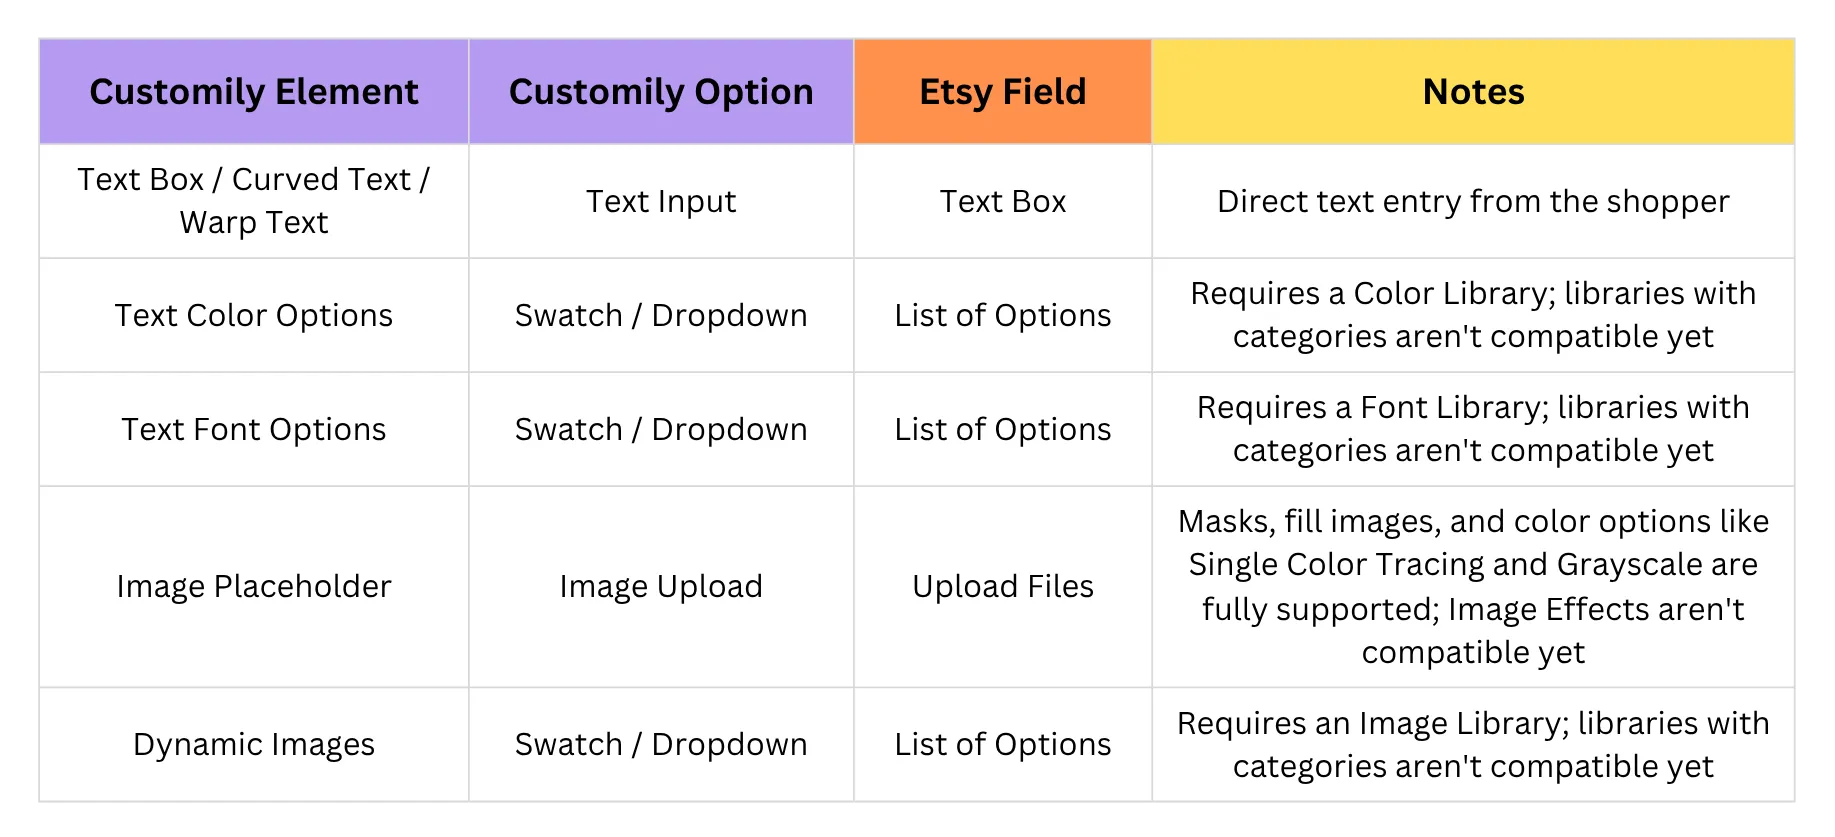
Each of these maps to one of Etsy's three native personalization field types: Text Box, List of Options, or Upload Files.
How Elements Map to Etsy Fields
Keep in mind that Etsy caps every listing at five personalization fields, so it's worth planning which customizations matter most for each product before you set things up.
Setting Up Etsy Personalization Mode, Step by Step
Before you enable Etsy Personalization Mode, you'll need four things in place: an Etsy listing with personalization fields configured, a Customily Template, a Customily Option Set, and Etsy Personalization Mode enabled on the product itself. Here's how they fit together.
Step 1: Build Your Template
Create your Template using only the elements supported by Etsy Personalization Mode: Text Box, Curved Text, Warp Text, Dynamic Images, and Image Placeholders, along with their font and color options where relevant.
Step 2: Create Your Option Set
Build an Option Set that mirrors the personalization choices you want to offer, linking each Option to the matching element on your Template so Customily knows exactly where each input should apply.
Step 3: Configure Your Etsy Personalization Fields
In your Etsy listing settings, turn on Personalization and add the fields your shoppers will fill in before buying - Text Box, List of Options, or File Upload - matching what you set up in your Customily Option Set. Remember the five-field limit per listing.
A few details matter here:
- For text customization: the Option Label on your Customily Option Set should match the Field Title on Etsy, and your Swatch Values (the names in your library) should match the Options listed on Etsy exactly.
- For image uploads: you can either label each Upload Files field to control precisely where each photo lands (matching the File Name on Etsy to each Option Label in Customily), or leave them unlabeled if the order doesn't matter, a good fit for collage-style products where shoppers are just sending a batch of photos.
- For dynamic images and clipart-style choices: it's worth adding a reference image to your Etsy listing photos showing each option, so shoppers know exactly what they're choosing between before they buy.
Step 4: Enable Etsy Personalization Mode
Open the product in Customily, assign your Template and Option Set, select Etsy Personalization under Personalization Mode, and save. From that point on, shoppers personalize the product directly on Etsy, and Customily automatically generates the production file as soon as the order comes through.
Find a complete guide on How to Set Up Etsy Personalization Mode for your Etsy Product here!
Why This Update Matters for Etsy Sellers
Personalized products are one of the most competitive - and fastest-growing - categories on Etsy. Buyers increasingly expect a smooth, native checkout experience, and having a flexible personalization setup can be the difference between a completed sale and an abandoned cart.
With Etsy Personalization Mode now available alongside Post-Purchase Personalization, you're able to:
- Offer a faster, more native checkout for straightforward customizations, without sending shoppers off to a separate personalization link.
- Keep complex, tool-dependent designs running through Post-Purchase Personalization, where Customily's full toolset and live preview still shine.
- Reduce the chance of orders sitting incomplete, since simpler personalizations are captured as part of checkout itself.
- Match the right experience to each product, rather than forcing every listing into a single workflow.
Getting Started
If you're currently using Post-Purchase Personalization for every product, there's no need to change anything, it's still the right call for your more complex, design-heavy listings. But if you sell simpler personalized items - monograms, names, dates, single photo uploads, or a handful of clipart choices - Etsy Personalization Mode is worth setting up. It's a small configuration step that can make checkout faster and smoother for a large share of your catalog.
Want help deciding which personalization mode fits a specific product, or need a hand mapping your Option Set to Etsy's fields? Contact our support team at support@customily.com or book a free call here, we're glad to help! 💫


.webp)


